Avec les prix de l'énergie qui restent élevés en Suisse (29 centimes/kWh en 2025) et l'arrivée du froid dès...

Protect your outlets Swiss-Domotique ESPHome with a password via Home Assistant
In this guide, we will explain how to secure access to the web interface of your Swiss-Domotique plugs via ESPHome and by assigning them a password. This will prevent anyone on your network from sending commands to your plug. This procedure is simple and requires just a few steps. If you have already set up the ESPHome Device builder add-on on Home Assistant, you can go straight to step 2 (adoption of the plug).
Prerequisites
Before you start, make sure that :
- Your plug Swiss-Domotique is connected to the network (we have another tutorial for this if you need it, you'll find it here) here). The socket doesn't need to be linked to Home Assistant, just connected to the network.
- You have Home Assistant configured on your local network.
Step 1: Install the ESPHome device builder add-on (if you haven't already)
1.Open Home Assistant.
2.Go to Settings, in the Add-ons, then in the add-on store, search for ESPHomedevice builder.
3.Install and start the add-on.
4.You can then check "show in sidebar". This will make it easier for you to access them.
Step 2: Adopt the plug in ESPHome (the ESPHome device builder add-on, not the integration)
1.Open the ESPHome device builder interface in Home Assistant.
2.Press "show" in the top right-hand corner to view the devices already discovered on the network.
3.Your take should be displayed. Press "take control".
4.Give it a name, then press "take control" again. (If your socket has already been connected to Home Assistant via ESPHome integration, you will also be asked to enter your Wi-Fi SSID and Password).
5.Then press "skip" when you are prompted to install the configuration on the socket. If you need the encryption key and it's displayed, you can copy it here, but don't worry, you'll find it later in the config file.
6.A warning message will appear to the effect that we've skipped installing the firmware on the socket and indicating that it will be possible to do so later, press "close" as we'll be doing just that later.
7.Buttons visit, edit, , logs and possibly update should now be displayed for your device.
Your plug may not have been automatically renamed. Refreshing the page should solve the problem.
Step 3: Define secrets in ESPHome device builder
1.Go to "secrets" at the top right of the page. You should have the Wi-Fi secrets already displayed like this:
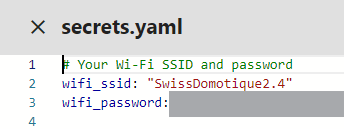
2.Add these 3 lines below:
1
2
3
# identifiers taken
web_server_username: "insert_your_username_here"
web_server_password: "insert_your_password_here"
Step 4: Modify configuration
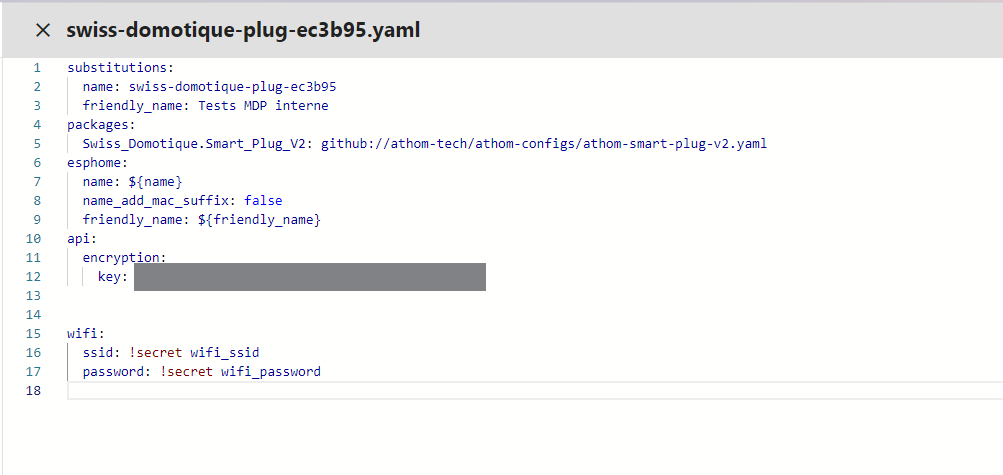
3.You can now exit the secrets file by pressing the cross at the top right of the screen. Then press the EditOf your socket to open the configuration file. You should see a text file resembling the image below:
4.Add the following code to insert the identifiers you have just defined in the secrets file into the socket configuration:
1
2
3
4
5
6
# Example configuration entry
web_server:
port: 80
auth:
username: !secret web_server_username
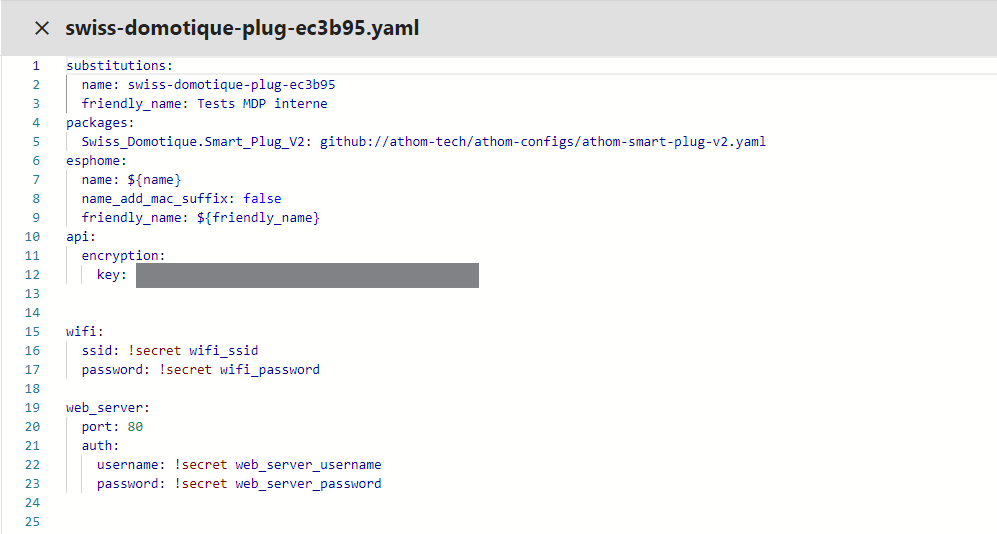
password: !secret web_server_passwordYou'll get a file similar to the one shown in the following image:
Step 5: Flash the configuration to the socket
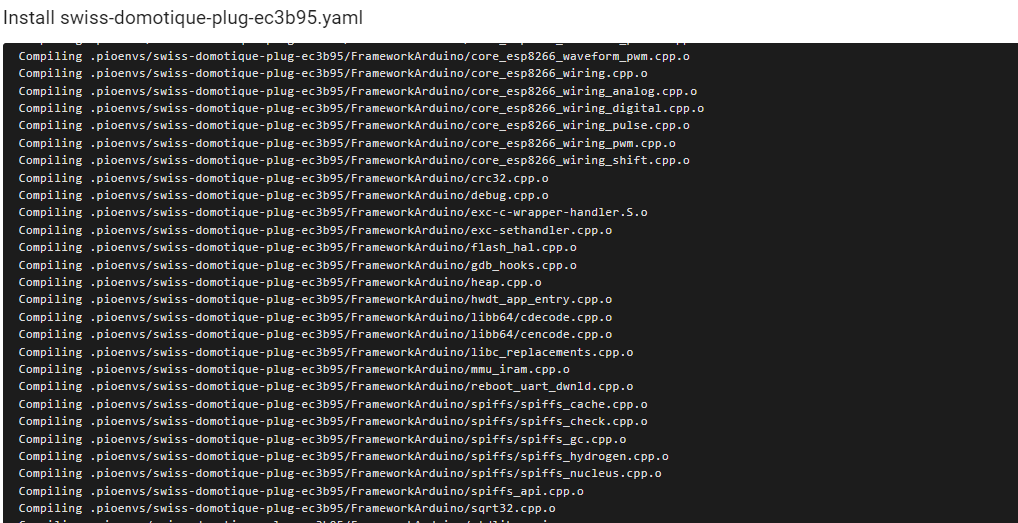
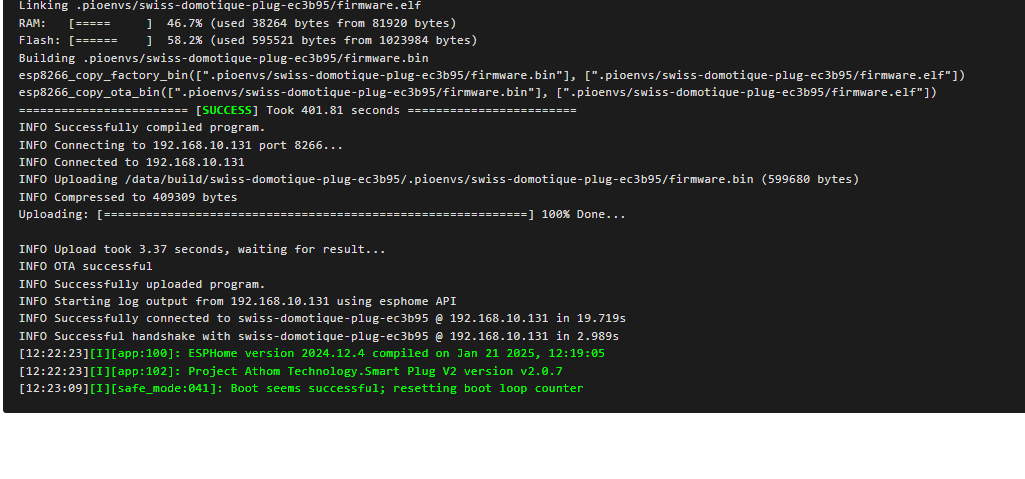
1.Then press the "install" button in the top right-hand corner.
2.Select Wirelessly, and a window will open resembling the one shown in the image below. Be careful not to terminate the process in progress. You must wait for the process to finish before pressing stop (see second image).
A line will display "Info successful handshake with swiss-domotique-plug..." as shown here. The process is now complete, and you can press "stop lower right.
Step 6: Access the plug's web interface
- Then use your plug's IP address to access its web interface from a browser.
- Enter the password you just set to log in!
Step 7 (optional): Add the plug to HA to control it
- If you haven't already done so, you can now add the plug's entities to Home Assistant via the ESPHome integration. (This is the integration, not the ESPHome add-on)
- To do this, go to Integrations and add ESPHome if you haven't already done so.
- Your plug will have been discovered straight away, so all you have to do is press "add".
- All entities will be added and you'll be able to use them directly for scripting and automation.
Further information
For more information on how to configure these sockets and their web interface, please refer to the official ESPHome documentation: https://esphome.io/components/web_server.
If you encounter any difficulties, please do not hesitate to consult the Home Assistant community or ESPHome for help.
And that's it! Your catch Swiss-Domotique is now password-protected. Happy home automation !
Posted in: Guides
Related product
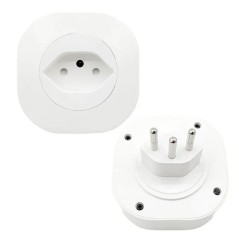
ESPHome Wifi plug in Swiss format
Old price: CHF24.90 Price: CHF19.42 Discount: 22% Save up: -CHF5.48
(45)
Swiss Wifi socket with power consumption monitoring and ESPHome chip for...
Leave a comment
Related posts
 Découvrez la boucle à induction magnétique
 L’accessibilité est un enjeu majeur dans la conception et l’équipement des bâtiments contemporains. Découvrez dans...
Read more Installing the SMLIGHT MR1 Zigbee/Thread and using it in Home Assistant In this article, we'll explain the features of the SMLIGHT MR1 and how it can be used in Home Assistant.
Read more Home heating in 2025: Guide to solutions available in Switzerland Avec les prix de l'énergie qui restent élevés en Suisse (29 centimes/kWh en 2025) et l'arrivée du froid dès...
Read moreBlog categories
Latest posts

Home heating in 2025: Guide to solutions available in Switzerland
Read more

Installing the SMLIGHT MR1 Zigbee/Thread and using it in Home Assistant Read more
In this article, we'll explain the features of the SMLIGHT MR1 and how it can be used in Home Assistant.


Support technique Read more
Do you own a connected product and need help getting it up and running or configuring it?

Découvrez la boucle à induction magnétique Read more
L’accessibilité est un enjeu majeur dans la conception et l’équipement des bâtiments contemporains. Découvrez dans...